Lesson 1,
Topic 1
In Progress
Activity 1: Array creation in PictoBlox
Array Creation
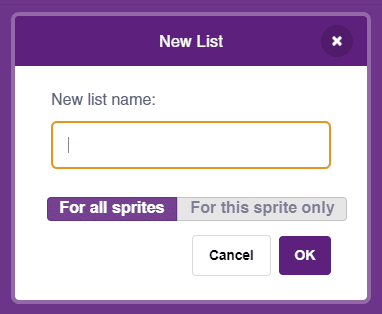
Create a list named Array from Variable palette.
You observe the following blocks populate for the array:
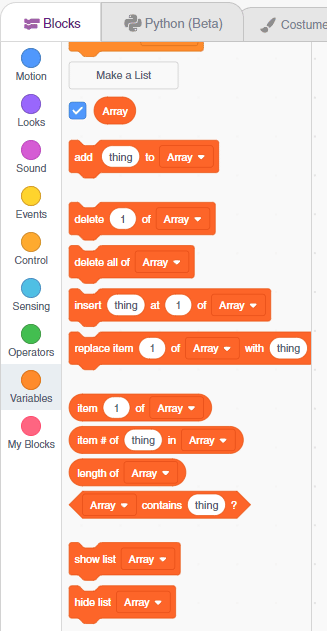
Blocks
There are a lot of blocks in the List, but for our understanding, we are going to focus on the following blocks:
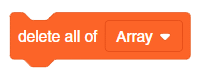
- delete all of () block: This block deletes all the items of the list.
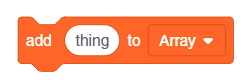
- add () to () block: This block adds an item to the list.
- item () of () block: This block reports the item from the specified position from the list.

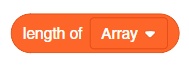
- length of () block: This block reports the length of the array.
Activity: Adding Elements to the Array
In this project, we want to do the following:
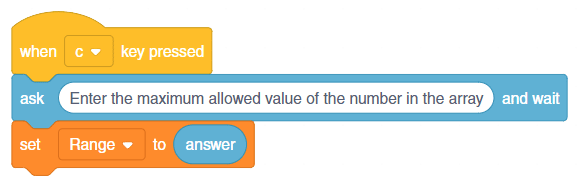
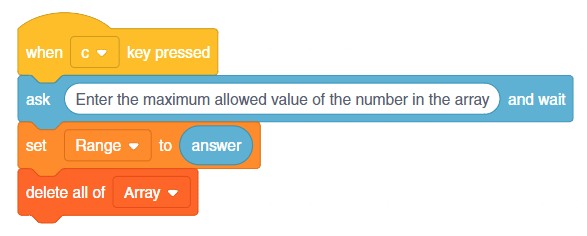
- Start the script when the “C” button is pressed.
- On start as the user, the maximum value of the elements allowed in the array.
- Then ask the user how many elements should be there in the array.
- Based on the above inputs create an array of the specified length with each element value picked randomly between 1 to the specified maximum value.

Coding
- Add when () key pressed block from Event palette into the scripting area.
- Create a variable named “Range” to store the maximum allowed value of the elements of the array.
- Create a user request to input the Range value and store the answer to the Range variable.
- Next, to reset the array, add delete all of () block.
- Next, get the user input on the length of the array using the ask and wait block.
- Next, add a repeat () block and add the answer in the parameter of the repeat () block.
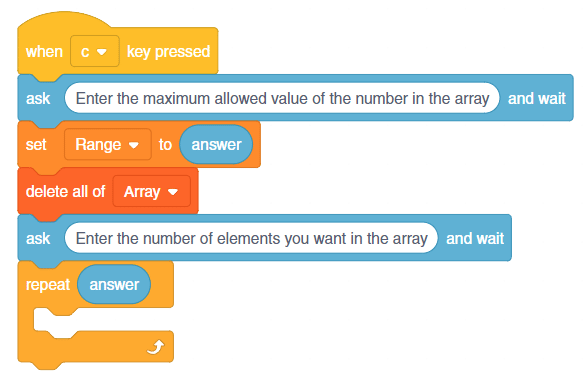
- Finally, add the elements to the array using add () to () block. Use the pick random () to () block to generate a random number for the element and add the Range variable in the second input of the random () to () block
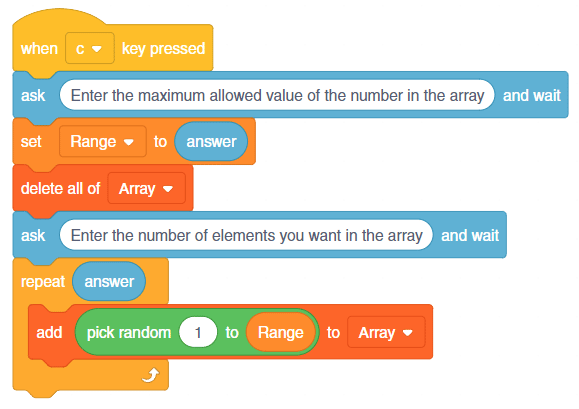
The script is complete.
Test it by pressing the “C” key.
Assignment
Before you move on to the next lesson, a small assignment awaits you!
You must upload the PictoBlox program you created in this activity to the website. Submitting the assignment is a must in order to receive the certificate after completing the course.
Follow the steps below to upload your assignment:
- Click on Choose File.
- Select the image from the pop-up window that opens up.
- Once the image is selected, click on Upload Assignment.

The file type allowed is the SB3 file generated from the PictoBlox program. The maximum file size allowed is 5 MB.
Good luck!