Session 2: Space Battle Game – Part 1
Space Battle
In this activity, we are going to make an exciting battle game that will take place in space! The game aims to destroy the army of space ghosts, by firing bullets at them.
The cool part? You’ll get to play the game, using the arrow keys of your computer.
Let’s begin!
Setting Up the Stage
- Open a new file in PictoBlox (in case of doubt, please refer to session 1).
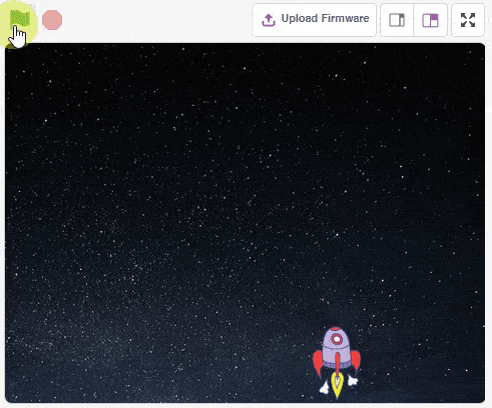
- Since this battle will take place in space, we need a backdrop that looks like outer space.
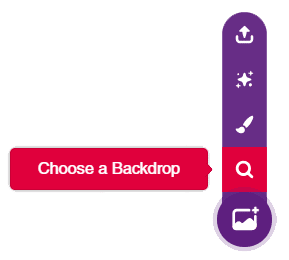
- Click on Choose a Backdrop (bottom left corner) and select the Stars backdrop from the library.
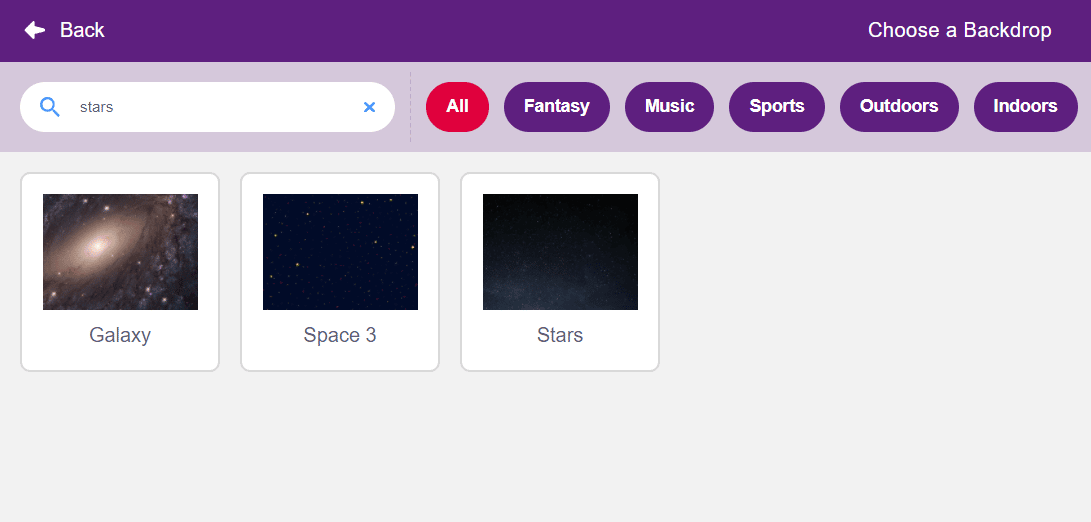
A backdrop is one of the many frames, or backgrounds, that a Stage can have. You can change the look of the Stage, by choosing an appropriate backdrop from the many backdrop options available, inside Choose a Backdrop window.
Bringing in the Sprites
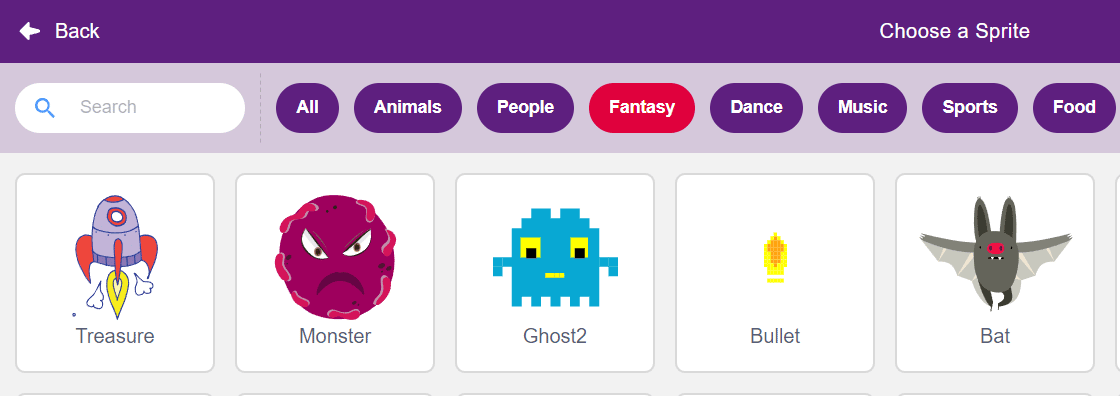
For this game, we need three sprites: our Rocketship, our enemy– the space ghosts, and something to destroy these ghosts – bullets.
![]()
Click the Choose a Sprite button (bottom left corner) and add the three sprites one by one from the library.
- Rocketship
- Ghost2
- Bullet
Readying the Rocketship

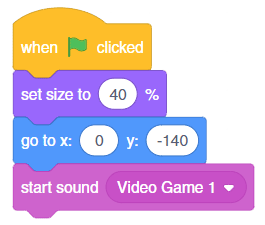
- Drag and drop a when flag clicked block from the Events palette in the scripting area.
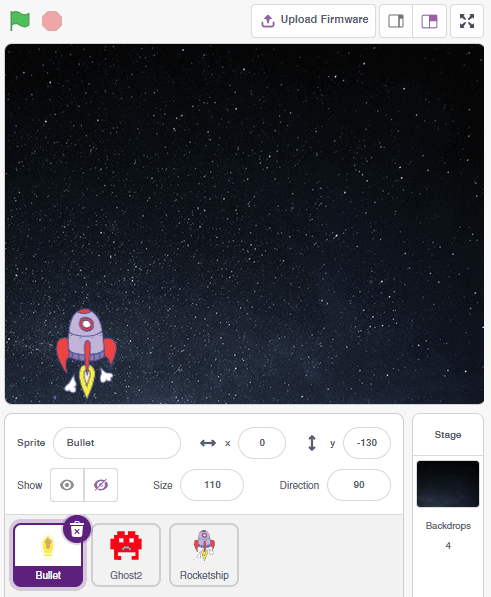
- Adjust the rocket’s size by choosing set size to ()% block from the Looks palette. Set it to 40% of the original size.
- Drag and drop a go to x:() y:() block from the Motion palette below the when flag clicked block. Set x as 0 and y as -140; this will be our Rocketship’s initial position.

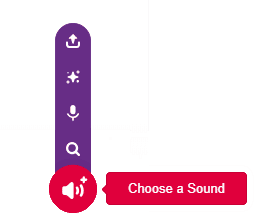
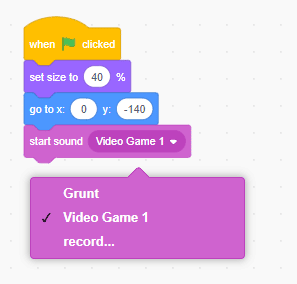
- This time, let’s add some music at the beginning of the game. First, add the start sound () block from the Sound palette.
- Now, click on the Sounds tab; it is next to the Costumes tab in the Block palette. In the bottom-left corner, you will find the Choose a Sound button. Select Video Game 1 from the library.
- To go back to writing the script, click on the Blocks tab. Now, from the drop-down of the start sound () block, choose Video Game 1.
Now comes the fun part! We are going to use the keyboard’s arrow keys and the space bar to control the actions of our Rocketship! For this, please follow the steps below -:
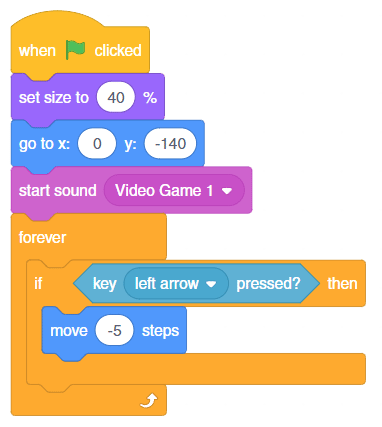
- Drag and drop a forever block (below the script we have made up till now) from the Control palette.
- Add an if () then block from the Control palette.
- From the Sensing palette, drag and drop the key () pressed? block and select the left arrow from the drop-down.
- From the Motion palette, add the move () steps block within the if () block. Write -5 within the move () steps block. Now, when you will press the Left arrow key, the Rocket will move left by 5 steps (That is: It will move -5 steps in the horizontal direction, along the x-axis). Isn’t this Awesome!!
- Now let us add another if () block, then we will drag and drop the key () pressed block but this time, select right arrow from the drop-down, also add the move () steps block within the if () block.
- Now, when you will press the Right arrow key on the keyboard, the Rocketship will go right by 5 steps
(That is: It will move +5 steps in the horizontal direction, along the x-axis).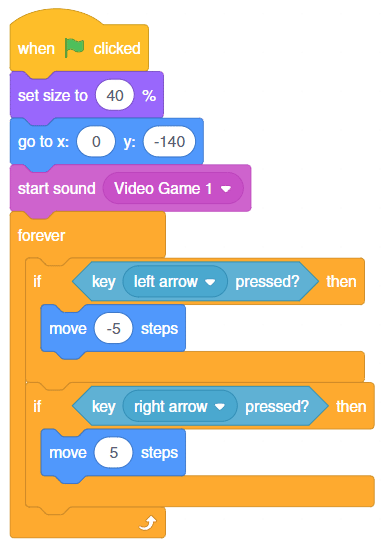
- Creating Clones of Bullet: For this, we will add another if () block within the forever block, then we will drag and drop the key () pressed block in it, but this time, we will select space. Now go to the Control palette and add create clone of () block and select Bullet from the dropdown.This will help you create multiple bullets (clones of your bullet) later. Also, add wait () seconds block from the Control palette and write 0.1 inside it, so that your next bullet fires, after a wait of 0.1 seconds.
- Below is the complete script:

- Don’t forget to save your script by the name Space Battle Game (If in doubt, refer to the previous session).
- Yayy! let us test the code we have written until now. Click on the green flag to start the script, and press the left and right arrow keys to check the movement of your Rocketship.

Assignment
Before moving on to the next lesson, a small assignment awaits you!
You must upload the PictoBlox program you created in this activity to the website. Submitting the assignment is a must in order to receive the certificate after completing the course.
Follow the steps below to upload your assignment:
- Click on Browse.
- Search and Select your saved Project file(.sb3) and Click Open.
- Click on Upload to submit the assignment.
Good luck!