Lesson 1 of 0
In Progress
Session 16: LED Looping Patterns with Quarky – 2
In the last lesson, we created a pattern using loops.
In this lesson, we will create an inverted pattern.

Let’s Code!
Follow the steps below to complete our script for the LED looping pattern:

Alert: Make sure that your Quarky is connected to PictoBlox using Bluetooth or USB.
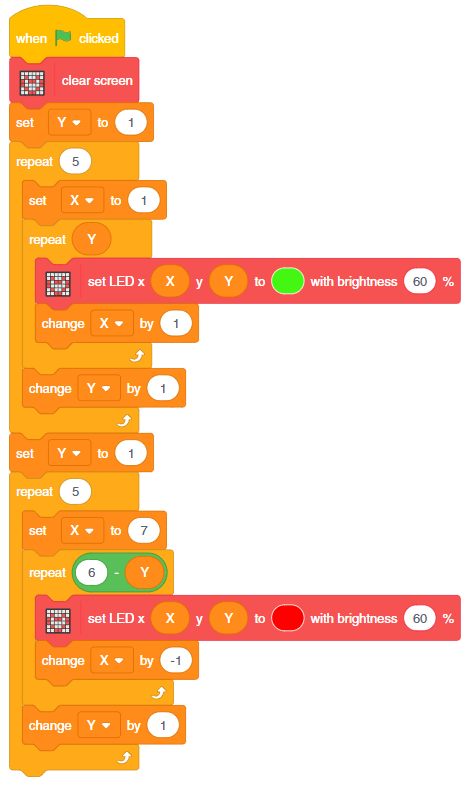
- We will start with the script from the previous lesson.
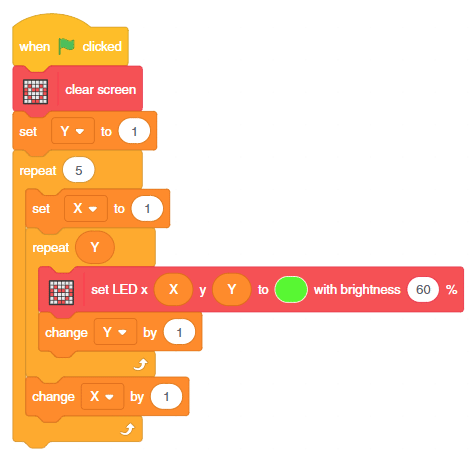
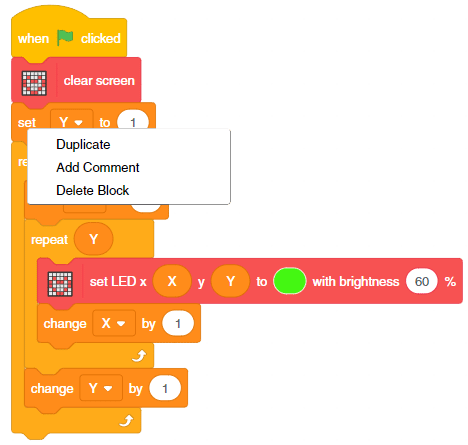
- Duplicate the blocks from the set (Y) to (1) block and snap it at the bottom.
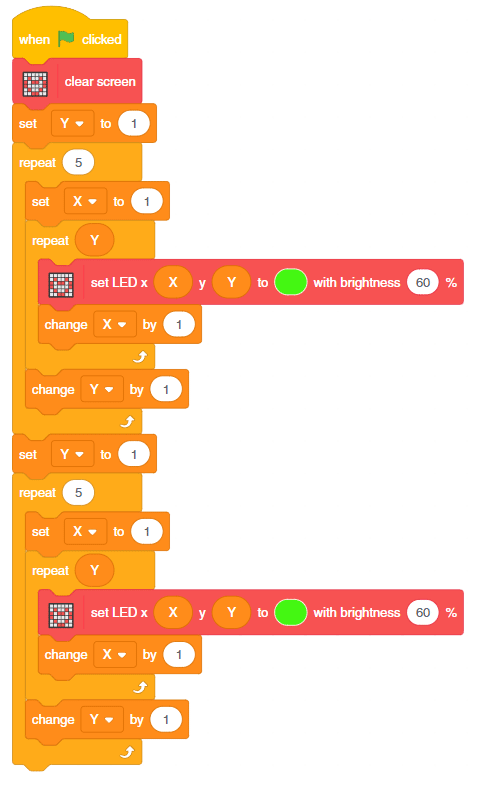
- Now we have to do the following changes:
- Inside the first repeat () block, we will set the X to 7. We will first glow the LED on the right and then come to the left.
- We have to repeat the second loop 6 – Y times. For example, the second loop will run 5 times for the first time.
- Change the color of the LED to Red.
- Lastly to move the LED to left, change X by -1.
That’s it.
Run the script and test the code.

Assignment
Before you move on to the next lesson, a small assignment awaits you!
You must upload the PictoBlox program you created in this activity to the website. Submitting the assignment is a must in order to receive the certificate after completing the course.
Follow the steps below to upload your assignment:
The file type allowed is the SB3 file generated from the PictoBlox program. The maximum file size allowed is 5 MB.
Good luck!