Session 8: Lamp with Quarky
From the script that we have made in the previous session, we learned how we can use quarky In this lesson, we are going to make a Lamp with Quarky.
Let’s make it!
Quarky Buttons
Before we start making our lamp, we need to understand Quarky’s buttons.
![]()
Quarky has 2 tactile switches or buttons which allow Quarky to take input from the user. You can get the state of the button in PictoBlox using is button () pressed? block.

The block reports 1 when the switch is pressed and 0 when the switch is not pressed.
The logic is simple – if we press the left switch, L, the lamp should turn OFF. If we press the right switch, R, the lamp should turn ON.
Let’s Code!

Follow the steps below to make the script:
- Go to the Sensors palette and add a is button () pressed? block into the scripting area. The button, L, is set as the default option.
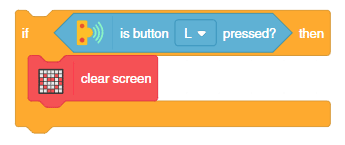
- To check if L is pressed, we’ll use an if block. Go to the Control palette and drop an if block into the scripting area. Drop the is button () pressed? block in the white space of the if block.
- If L is pressed, then, according to our logic, the LEDs should turn OFF. Therefore, go to the Display palette and drop a clear screen block inside the if block.
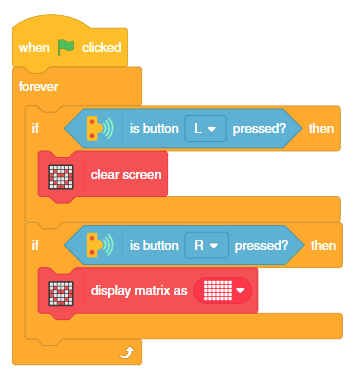
- However, if R is pressed, then the LED should turn ON. Therefore, add another if block below the first one and drop a is button () pressed? block in the white space.
- Then, go to the Display palette and drop display matrix as () block inside the if block, and set all the LEDs as white.
- Add a forever block around the entire script.
- To add the finishing touch, add a when flag clicked block from the Events palette above the forever block.
Finally, click the green flag to run the script.
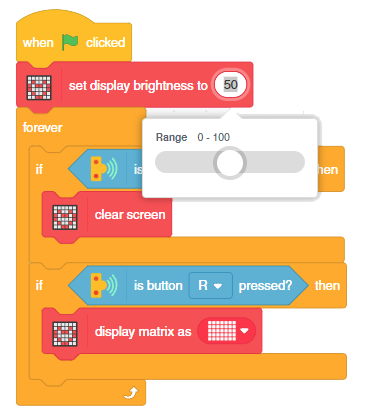
You can also control the intensity of the lamp by changing the brightness of the LEDs. You can do it with set display brightness to () block from the Display palette. Add the block just below the when green flag clicked block to set the brightness level at the start of the program.
What We Have Learnt
In this lesson, we learned how to use Quarky switches (L and R) to turn LEDs ON-OFF and how to control LED brightness.
Assignment
Before you move on to the next lesson, a small assignment awaits you!
You must upload the PictoBlox program you created in this activity to the website. Submitting the assignment is a must in order to receive the certificate after completing the course.
Follow the steps below to upload your assignment:
Good luck!